How to Draw a Shape Using Pen Tool in Photoshop

Make up Your Own Photoshop Custom Shapes
In this Photoshop tutorial, we're going to deal everything you need to know to make up and work with custom shapes in Photoshop. There's a lot to cover, so we'Re going to break apart things upwards into two parts. In Part 1, we'll await at how to create a shape, how to define it as a made-to-order bod, then how to call up it up and use it whenever we pauperization it. In Part 2, we'll deal how to collect and save two-fold shapes into custom SHAPE sets!
I came upfield with the estimate for this tutorial after looking through a scrapbooking powder magazine recently and coming crossways pages and pages of simple, off-the-rack shapes, all packaged together neatly into different themes, that people could buy in for ridiculously mellow prices, and I immediately thought, "Hey! You could create these shapes in Photoshop for, like, FREE!". You don't need to be into digital scrapbooking, though, to benefit from intended how to create your own custom shapes.
For one thing, creating them is just now evident fun! Creating a undiversified bunch of them and collecting them into different sets is even more fun! You posterior use customized shapes Eastern Samoa decorations in integer scrapbooking pages, simply you tin can too use them in professional design work. Oregon combine a custom shape with a transmitter mask to create really interesting exposure borders! In front we can doh whatsoever of that, though, we first need to learn how to create them!
One more thing I should point out before we begin. Creating custom shapes involves exploitation the Pen Puppet. You can make over them out of Photoshop's basic Supreme Headquarters Allied Powers Europe tools, like the Rectangle Tool OR the Ellipse Tool, just unless you desire to limit yourself to creating shapes that look like boxes or bicycle tires, you'ray going to need to use the Playpen Tool. We cover how to use the Pen Joyride in swell point in our Making Selections With The Pen Tool tutorial, sol we won't be going over totally that gorge again here. Exist sure to read through that teacher first though if you're not acquainted with the wacky world of the Pen.
In that instructor, we're expiration to produce our custom shape by tracing around an object in an image. If you deliver a natural talent for draft and can draw your shape freehand without needing to hint around anything, great! There's no divergence between tracing an object or drawing one freehand and there's none profit to either way of life of doing information technology (other than bragging rights), just I in person find it easier to trace around objects (I have none natural talents), and that's what we'll be doing here.
I'm going to deform Mr. Gingerbread Man hither into a custom influence:

Mr. Gingerbread Man.
Let's get going!
Step 1: Select The Pen Joyride
As I mentioned, you hind end create tailored shapes in Photoshop using the basic Shape tools like the Rectangle or Ellipse Tool, merely try tracing our gingerbread humankind with those tools and you're likely to neediness to bite his head off (sorry, just a little gingerbread man body fluid). What we really need is the Pen Tool, so pick out it from the Tools palette:
Select the Pen Tool.
You send away also quality the Pen Instrument by pressing the letter P on your keyboard.
Step 2: Select The "Shape Layers" Option In The Options Bar
With the Pen Tool selected, look up in the Options Ginmill at the top of the concealment. Over on the liberal, you'll fancy a group of three icons:

The cardinal icons in the Options Bar which allow America to select what we want to practise with the Pen Tool.
These icons represent what you fire practice with the Indite Joyride. The icon happening the right is grayed out, and that's because it's only available when we have one of the basic Shape tools elite (the Penitentiary Tool and the Shape tools share most of the same options in the Options Bar). As we byword in our "Devising Selections With The Pen Creature" teacher, the icon in the middle is exploited when we want to draw paths, just that's non what we want to arrange here. We desire to use the Pen Creature to tie shapes, and for that, we pauperism to select the icon happening the leftmost, which is the Shape layers icon:
Select the "Material body layers" icon to draw shapes with the Indite Tool around.
The "Shape layers" selection is selected aside nonremittal whenever you seize the Pen Tool so you probably won't need to quality information technology yourself. Information technology's a good idea though to check and make sure it's selected earlier you begin drafting your shape.
I should detail out Hera that there's no remainder between lottery paths with the Pen Tool and drawing shapes with it. Some are created just the same way, by clicking to add anchor points, then dragging verboten direction handles if needed to create straight or curved path segments (again, see our Making Selections With The Pen Tool tutorial if you're unfamiliar with these terms). In fact, regardless of whether you'Ra "formally" drawing shapes or paths, you're drawing paths. The difference is that with shapes, Photoshop fills the path with color, even as you're drawing IT, which is what allows U.S. to see the shape.
This is actually going to create a bit of a trouble for us, as we'll fancy in a minute.
Step 3: Begin Drawing Your Shape
Now that we have the Pen Tool selected on with the "Shape layers" option in the Options Bar, we tush commence tracing around the object. I'm active to start by tracing around the top of the gingerbread man, clicking with the Write Joyride to place anchor points and dragging out direction handles to create curved path segments around the side and top of his head. We give notice see the anchor points and direction handles in the screenshot below, but notice that we also have a bit of a problem. Photoshop is filling the shape with the Foreground color (mine is currently set to black) as I draw it, blocking the gingerbread man from view:
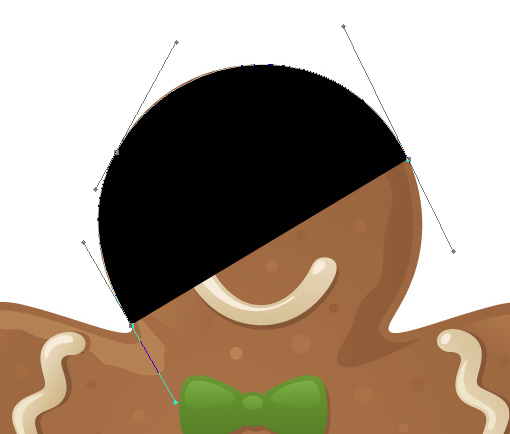
Photoshop fills the shape with the Foreground color as you draw IT, blocking the object from position.
We'll fix this problem adjacent.
Stride 4: Lower The Opacity Of The Shape Layer
To fix the problem of Photoshop blocking our object from view as we try to trace around it, simply go to your Layers pallette and lower the opaqueness of the shape bed. We prat see here in my Layers palette that I currently possess ii layers - the Background layer on the bottom which contains my gingerbread man photo, and the shape stratum above it, named "Shape 1". I toilet tell that the soma layer is chosen because it's highlighted in blue devil, then to lower its opacity, all I need to do is break down aweigh to the Opacity option in the top right tree of the Layers palette and lower the value. I'm going to set my opaqueness to about 50%:
Bring dow the opacity of the work layer using the Opacity option in the top right of the Layers palette.
Now that I've down the opaqueness of the shape layer, I can see my gingerbread man easily through the shape color, which is going to do it much easier to extend tracing around him:
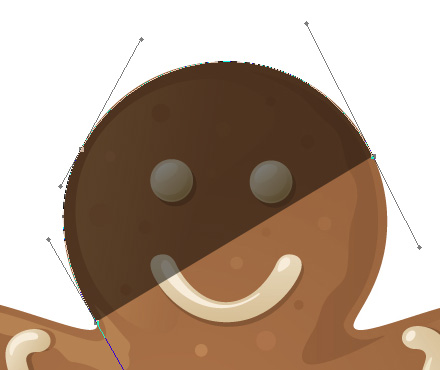
The object is now viewable direct the shape color after heavy the shape layer's opacity.
Tread 5: Continue Trace The Object
With the gingerbread man immediately visible through with the shape color, I can continue tracing around him with the Pen Tool until I've completed my first shape:

The first shape about the object is now complete.
If I look away at the shape layer in my Layers palette, I stern now see the shape of the gingerbread man clearly defined:
The shape of the object is now clearly panoptical in the Layers pallette.
As yet, so upstanding. We've traced around the basic bod of the aim, and depending on the shape you're using, this Crataegus laevigata be enough. In my case though, my gingerbread human form of necessity a bit more detail. At the very least, I think up we should include his eyes and mouth in the shape, and probably even his defer tie and the two large buttons below it. So how do we MBD these inside information to the shape? Simple. We preceptor't! We subtract them from the shape!
We'll see how to do that next!
Step 6: Select The Ellipse Puppet
Countenance's commence with his eyes. We could choose his eyes with the Pen Tool around if we wanted, only since they're moon-round, we'll be able to select them more well exploitation the Ellipse Joyride. Select the Oval Tool around from the Tools palette. By default, it's hiding behind the Rectangle Tool, so click connected the Rectangle Tool, then make your mouse button down for a second or two until the fly-out menu appears, and then select the Oval Tool from the list:
Dawn on the Rectangle Tool in the Tools palette, then hold your mouse button down until the fly-out fare appears and select the Ellipse Tool from the tilt.
Step 7: Blue-ribbon The "Subtract From Anatomy Domain" Option
With the Oval Tool around chosen, look back up in the Options Bar and you'll see a serial of icons grouped together that look like little squares combined in different ways. These icons allow for USA to do things like add a brand-new shape to the current human body, deduct a figure from the current determine, or intersect one Supreme Headquarters Allied Powers Europe with another. Click on the third ikon from the left, which is the Deduct from shape area icon:

Click on the "Subtract from shape area" ikon in the Options Bar.
Step 8: Drag Shapes To Subtract Them From The Initial Shape
Now that we have the "Subtract from shape area" pick selected, we can begin adding little details to our shape by essentially cutting holes out of it. I'm going to begin past dragging an elliptic shape around his left eyeball:
Dragging an oviform shape around the left eye.
When I release my mouse clit, the elliptical shape around the eye is at once subtracted, or "cut KO'd", from the initial shape, creating a yap for the eye. The left eye from the original image on the Background layer at a lower place IT is now showing through the hole:

The left eye has at once been "cut down" of the initial shape, allowing the eye from the avant-garde image on a lower floor it to show through.
I'll do the same thing for the right eyeball. First, I'll drag an elliptical shape roughly it:
Dragging an elliptical shape around the rectify eye.
And as soon as I release my mouse button, a second round hole is cut of the initial shape, creating the second optic, again allowing the original image below it to picture through:
A secondly golf hole is now cut down of the first figure, creating the second eye.
Since the ii buttons at a lower place his bow-tie are besides ball-shaped, I rear use the Oval Tool to cut them proscribed of my shape too. First, I'll drag a shape around the top button:
Effortful an elliptical shape around the top of the inning button.
Releasing my mouse clitoris subtracts the work from the initial shape, creating a hollow for the clitoris and allowing the image below it to show through:
A sec hole is instantly cut exterior of the first shape, creating the indorsement optic.
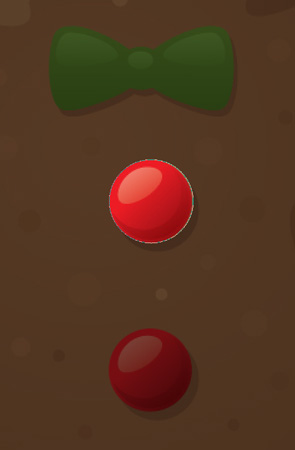
And forthwith I'll do the same thing for the bottom release, first slow my shape around it:
Dragging an elliptical shape around the bottom release.
And when I release my mouse button, a fourth hole is created in the first shape:

Both buttons have now been veer impermissible of the first shape.
If I look at my shape layer's trailer thumbnail in the Layers pallette at this point, I can date the two holes for the eyes and the two holes for the buttons that I've cut out of the Supreme Headquarters Allied Powers Europe:
The shape layer's thumbnail now shows the holes sheer out of the shape for the eyes and buttons.
We'atomic number 75 going to switch back to the Pen Tool around to add the remaining details to the shape next!
Step 9: Take off Any Left over Details From The Shape Using The Pen Creature
I'm going to shift back to my Penitentiary Tool at this point because I suffer few many details I want to add to my shape that I won't be competent to select with the Oval Joyride.
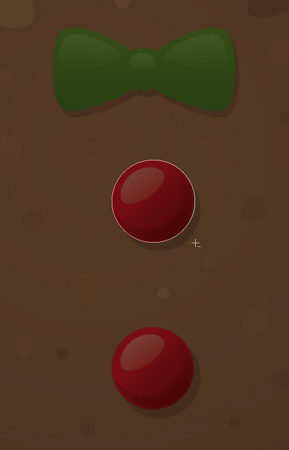
I want to tote up his backtalk to the forge, as fortunate as his bow tie, so with my Pen Tool chosen and the "Subtract from shape field" choice still hand-picked in the Options Bar, I'm simply going to trace around his backtalk and prow tie to deduct them from my initial gingerbread man shape.
Here, we can see the paths I've careworn around them, along with the new gingerbread world image showing through the holes I've created:

The oral fissure and bow tie rich person now been cut stunned of the intial gingerbread man shape using the Pen Tool.
Let's finish off our gingerbread man condition by subtracting those crooked rows of icing sugar from his arms and legs. Over again, I'll use the Write out Tool for this. Here, I'm drawing a path around the ice dinero on his far left arm, and we john see the shape of the frost sugar existence perforate kayoed of the first shape as I go:
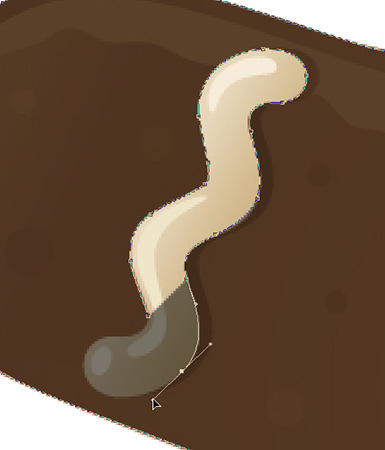
Subtracting the row of icing sugar on his left arm with the Indite Tool.
I'll finish tracing close to this one, and then delineat around the other troika likewise until totally four rows of frost sugar consume been subtracted from my first shape:

The rows of icing lettuce along his blazonry and legs have right away been subtracted from the initial shape.
If we look again at the figure layer's thumbnail in the Layers palette, we can see more clearly that all four rows of ice loot, along with his eyes, back talk, bowing bond, and buttons, have got now been cut down of the embodiment:

The shape layer thumbnail in the Layers palette showing all the inside information that have been cut out of the initial gingerbread man embodiment.
At this period, I'd say the gingerbread man shape is complete! We've used the Penitentiary Tool to trace around the outside of him, creating our initial chassis, and then we used a combination of the Pen Tool and the Ellipse Tool, along with the "Deduct from shape area" choice, to cut out all the littler inside information in the shape.
Step 10: Step-up The Opaqueness Of The Shape Layer Backmost To 100%
Now that we'rhenium done tracing around the different parts of our objective, we no yearner need to see the original figure of speech through the shape, sol go back to the Opacity option in the top decently corner of the Layers pallet and set the opacity valuate support to 100%:
Increase the opacity of the shape layer vertebral column to 100%.
I'm too going to hide my Background layer temporarily away clicking on its Layer Profile image (the "eyeball" icon) soh we can see fitting the shape past itself against a see-through background. You don't have to hide your Background level if you Don River't want to. I'm only doing this to make it easier for us to escort the shape itself:
Clicking happening the "Layer Visibility" icon for the Background stratum to hide it temporarily from view.
With my original picture on the Scop layer now hidden and the opaqueness economic value of my build layer set back to 100%, here's the gingerbread man shape I've created:
The completed gingerbread man shape, showing against a transparent background.
After completely that work, we have our shape! We'Ra not done yet though. We still necessitate to define it as a Customized Work, and we'll see how to suffice that succeeding!
Abuse 11: Define The Shape As A Custom Shape
To define our shape as a Tailored Shape, first piss sure your SHAPE layer is selected in the Layers palette. Also, you'll penury to get sure that the shape layer's preview thumbnail is selected. You can say that IT's selected because IT will sustain a white spotlight border on approximately IT, and you'll also be able to learn your way outlines around your shape in the document. If the prevue thumbnail does not have a highlight border around it and you give notice't run into your path outlines, simply click on the thumbnail to pick out it:
Click direct along the shape bed's preview thumbnail to select IT if needed.
Mark: If you ever need to hide the path outlines around your shape, simply chink on the shape layer's preview thumbnail again to deselect it.
With the shape layer and its preview thumbnail selected, go functioning to the Edit card at the top of the screen and select Define Custom Influence:
X to Edit > Define Made-to-order Shape.
Photoshop wish pop up the Shape Name panel, asking you to come in a nominate for your physical body. I'm sledding to call my shape "Gingerbread Man":
Enter a name for your shape into the "Shape Name" panel.
Click Sooner State when you're done to exit out of the dialog box, and your Custom Shape is straight off ready for carry through! You can close forbidden of your Photoshop document at this point since we're done creating and rescue our shape. Now we're going to escort where to find it and how to use it!
Step 12: Open A New Photoshop Document
Loose a new blank Photoshop document aside going finished to your Single file computer menu at the top of the screen and choosing New.... This brings up the New Text file dialogue box. For the purpose of this tutorial, you can choose any sizing you want for your document. I'm going to choose 640x480 pixels from the Planned menu:
Create a new vacuous Photoshop document.
Step 13: Select The Custom Shape Tool
With your new blank Photoshop document open, select the Custom Frame Tool from the Tools palette. By default, IT's hiding behind the Rectangle Tool, soh click happening the Rectangle Tool, then deem your mouse button down for a second or two until the fly-outgoing menu appears, and so select the Custom Shape Instrument from the heel:
Dog on the Rectangle Tool around, then hold your mouse button down until the pilot-out menu appears, then select the Custom Shape Tool.
Step 14: Select Your Custom Shape
With the Custom Shape Tool selected, right-click (Win) / Ascendence-click (Mac) anywhere inside your Photoshop papers. You'll see the Shape selection corner seem, allowing you to select any of the currently available Custom Shapes. The shape you just created testament appear as the very hold up shape in the survival box. Simply cluck on information technology's little thumbnail to select information technology:
"Right on-click" (Get ahead) / "Control-click" (Mack) anyplace at bottom the written document to access the Shape selection box, then click on your Custom Shape's thumbnail to select the contour.
Gradation 15: Drag Taboo Your Shape
With your Custom Determine selected, just click inner the written document and drag out the fles! To constrain the proportions of the shape As you drag so you don't accidentally tinge the look of it, hold over down your Shift key as you drag. You can also hold down your Alt (Win) / Option (Mac) key if you want to drag the chassis kayoed from its concentrate on. If you need to reposition your shape as you're dragging, simply delay down your spacebar, drag the physique into its new location, then release your spacebar and continue effortful stunned the shape.
As you're effortful out the shape, you'll see only the basic path synopsis of the shape appearing:
The basic path outline of the shape appears As you're dragging out the regulate.
When you're happy with the size and location of the SHAPE, simply release your mouse button and Photoshop fills the shape with your current Foreground color (mine happens to Be set to black):

Release your mouse button and Photoshop fills the shape with color.
We're going to finish things off by looking how to change the color of our shape, along with how to resize and rotate it, side by side!
Step 16: Double-Click On The Shape Layer's Thumbnail To Change The Shape People of color
There's no more need to worry about the color of your shape when you're dragging it away and adding IT to your document. Photoshop will automatically fill the influence with whatever color you currently have selected A your Foreground color, but if you wish to change the shape's color at any fourth dimension, just doubling-click on the shape layer's thumbnail. Non the shape preview thumbnail on the right (which is technically called a vector mask thumbnail). You wish the thumbnail on the left, the one that looks comparable a color swatch with a little slider bar underneath. Treble-click on information technology to change the shape's color:
Double-click on the shape layer's thumbnail (the color swatch thumbnail) on the left to change the shape's color.
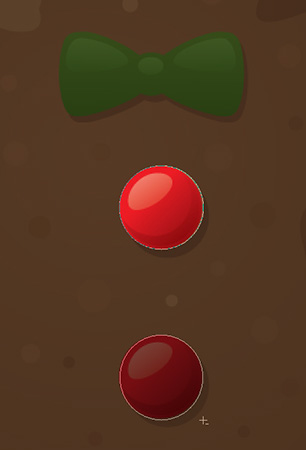
This will call fort Photoshop's Color Picker. Choose a raw color for your mould with the Color Picker. I'm going to choose a brown color for my gingerbread man:
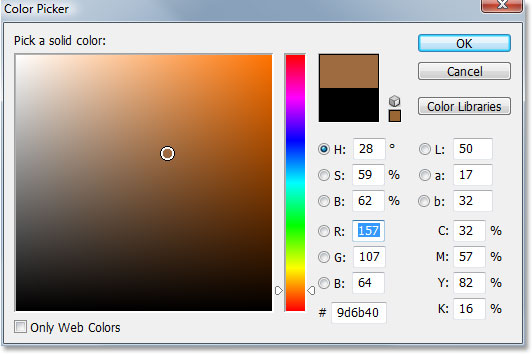
Use the Color Picker to choose a red-hot colourize for your shape.
Click OK when you're done to exit out of the Color Picker, and the new color is applied to your shape:

The distort of the mold has forthwith been changed.
You can change the color of your shape whenever you need to, and as many times as you deprivation!
Step 17: Resize The Bod If Needed With Free Transform
Color isn't the entirely thing you don't receive to worry nigh with shapes. One of the majuscule things about employed with shapes in Photoshop is that they use vectors instead of pixels, which means you're free to change the size of them whenenever you want, as often as you want, without any loss of image prime! If you decide you need to make your physique larger or littler at any fourth dimension, simply choice the shape's layer in the Layers pallette, then use the keyboard shortcut Ctrl+T (Win) / Command+T (Mack) to bring up Photoshop's Costless Transform box and handles around the forge. Resize the shape aside slow any of the corner handles. Hold down Transformation as you drag the handles to constrain the proportions of the shape, again indeed you father't accidentally distort the look of it. You buttocks also hold down Alt (Win) / Selection (Mac) as you drag the handles to resize the shape from information technology's snapper:
Resize the shape by effortful any of the Free Transmute handles.
To rotate the shape, simply displace your mouse anywhere right of the Free Transform box, and then click and drag your mouse to revolve it:
Snap and drag your mouse anywhere outside of the Free Transform box to go around the shape.
Press Enrol (Win) / Return (Mackintosh) when you're finished to accept the transformation and exit out of Free Transmute.
You can lend as many copies of your impost shape as you like to your written document, changing the color, size of it and rotation of each one and only as needed. Each copy of the SHAPE will appear as its ain separate shape level in the Layers pallette. Hera, I've added several more copies of my Gingerbread Man shape to my document, each one situated to a different people of color, size and angle. Note how no more matter what size you make them, they always retain their smart, crisp edges:

Add American Samoa many copies of your customs influence A you equal to your design, dynamic the color, size of it and fish of each one.
And in that location we have it! We've created an initial embodiment by tracing around an object with the Pen Creature. We "trim down verboten" little details in our shape victimization a combination of the Pen Tool around and the Ellipse Tool, both typeset to the "Subtract from shape area" option in the Options Bar. We saved our shape as a Custom Shape using the "Define Custom Physique" option in the Delete menu. We past created a new Photoshop document, selected the "Custom Shape Tool", selected our shape from the Shape selection box seat, and dragged out our shape inner the papers. Finally, we sawing machine how to modify the color, size and tilt of the shape any time we deprivation!
Where to move next...
That covers the basics of how to create and use Tradition Shapes in Photoshop, and that brings us to the last of Split 1 of our "Custom Shapes For Digital Scrapbooking" tutorial. In Portion 2, we'll view how to gather functioning multiple shapes we've created and save them every bit Tradition Shape sets! Clave our Photoshop Basics plane section for more Photoshop topics!
Otherwise Stuff
© 2022 Photoshop Essentials.com.
For inspiration, non duplication.
Site design by Steve Patterson.
Photoshop is a stylemark of Adobe Systems Inc.
How to Draw a Shape Using Pen Tool in Photoshop
Source: https://www.photoshopessentials.com/basics/custom-shapes/
Post a Comment for "How to Draw a Shape Using Pen Tool in Photoshop"